Creating a PHP webhook for DialogFlow (API.AI)
If you have the choice to go for Python or NodeJS instead of PHP, I recommend using the other two options (between the two, I prefer Python). You will probably find it quite hard to find a lot of discussion online about using PHP with Dialogflow.
This is intended to be a very basic, beginner’s article for getting started with API.AI webhooks using PHP. I am making the following assumptions:
a. You have a website where you can run PHP scripts
b. You have sufficient permissions to be able to create new folders etc on the host without too much difficulty
Code sample
This tutorial is primarily based on the following code sample provided on the API.AI forum:
function processMessage($update) {
    if($update["result"]["action"] == "sayHello"){
        sendMessage(array(
            "source" => $update["result"]["source"],
            "speech" => "Hello from webhook",
            "displayText" => "Hello from webhook",
            "contextOut" => array()
        ));
    }
}

function sendMessage($parameters) {
    echo json_encode($parameters);
}

$update_response = file_get_contents("php://input");
$update = json_decode($update_response, true);
if (isset($update["result"]["action"])) {
    processMessage($update);
}
Note that I made the following changes to the code sample:
a. Stripped out the comments
b. Changed the action value from “buscar.nfe” to “sayHello”
c. Changed the speech and displayText values to “Hello from webhook”
Create test.php
To use the above code, start with a file called test.php. Paste the entirety of the code into test.php and save it. Place the file inside a folder called webhook (for example).
Now upload the webhook folder to your website. I will assume, for this example, that you are uploading the folder to the root of your website. If your website is called example.com, then the php file will be located at example.com/webhook/test.php
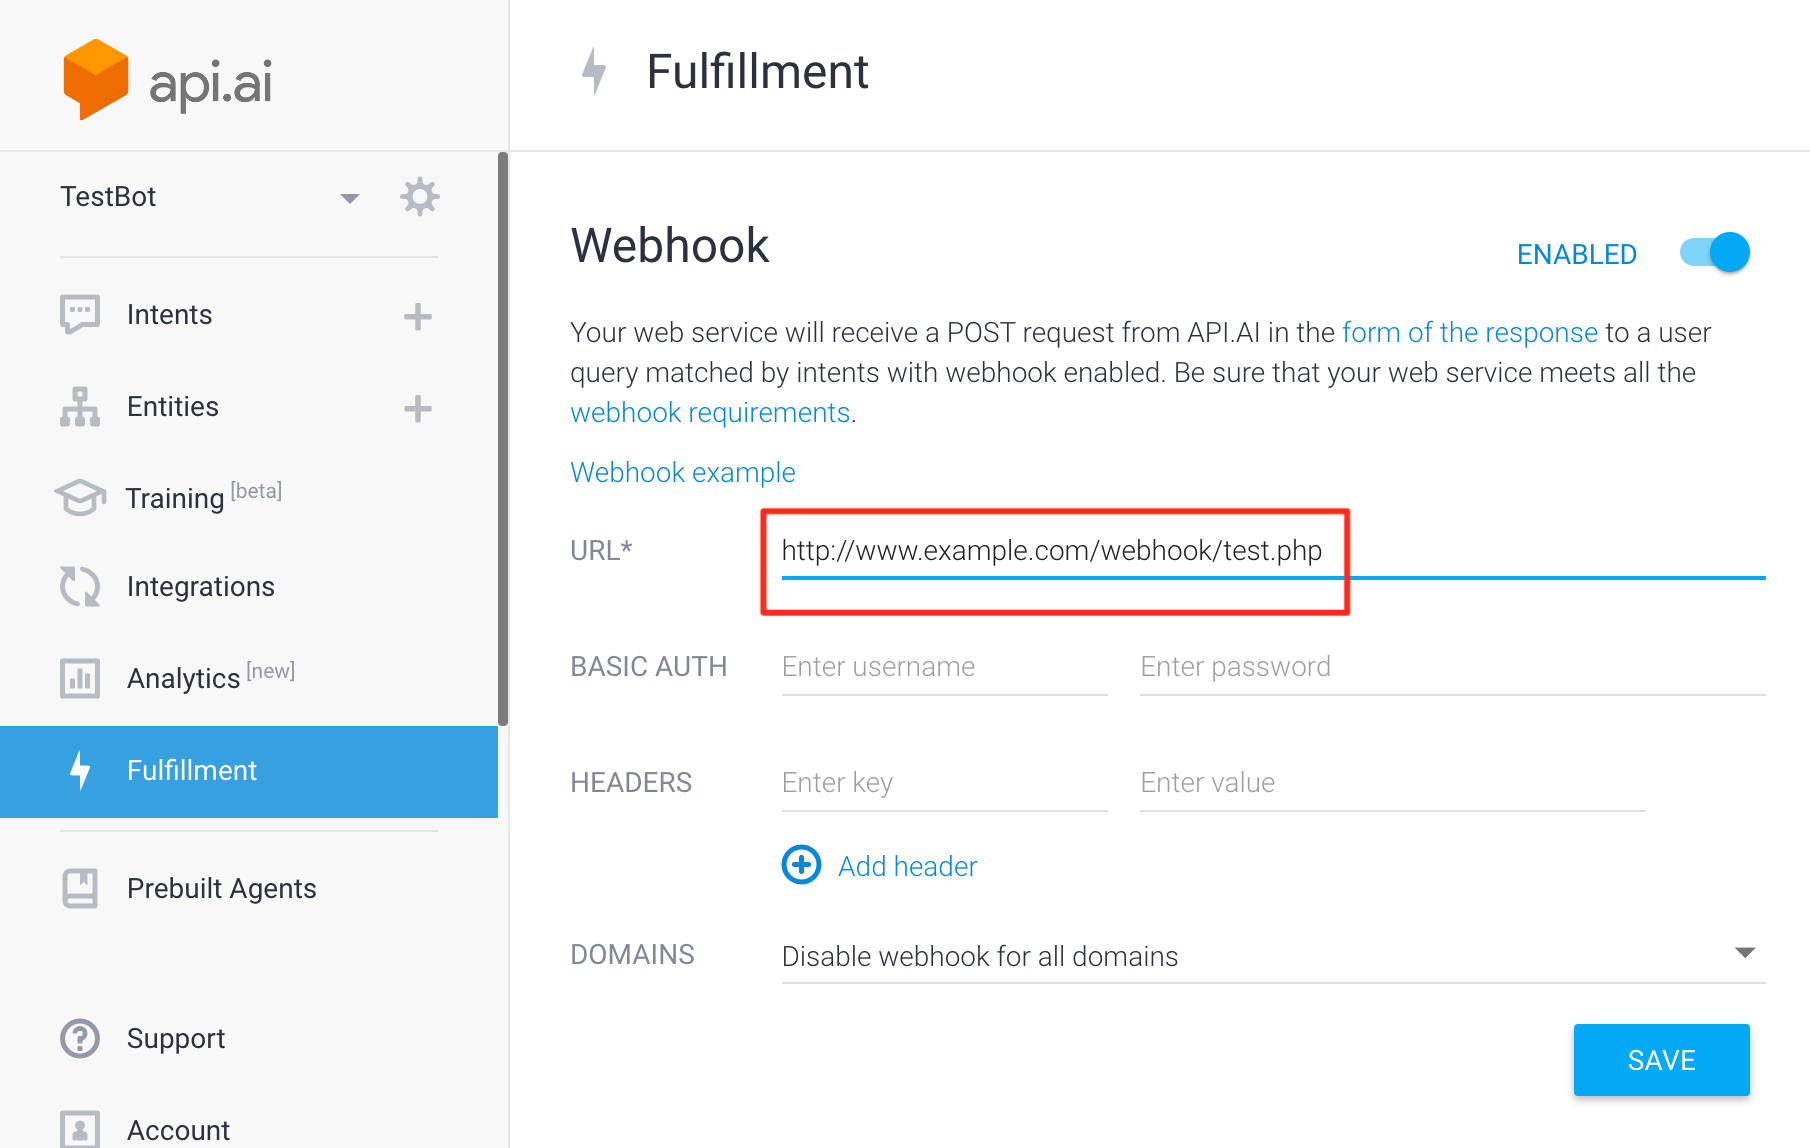
Add the webhook URL
Under the Fulfillment tab in your API.AI console, add the following URL:
http://www.example.com/webhook/test.php
Make sure you use https instead of http if your site already is https.
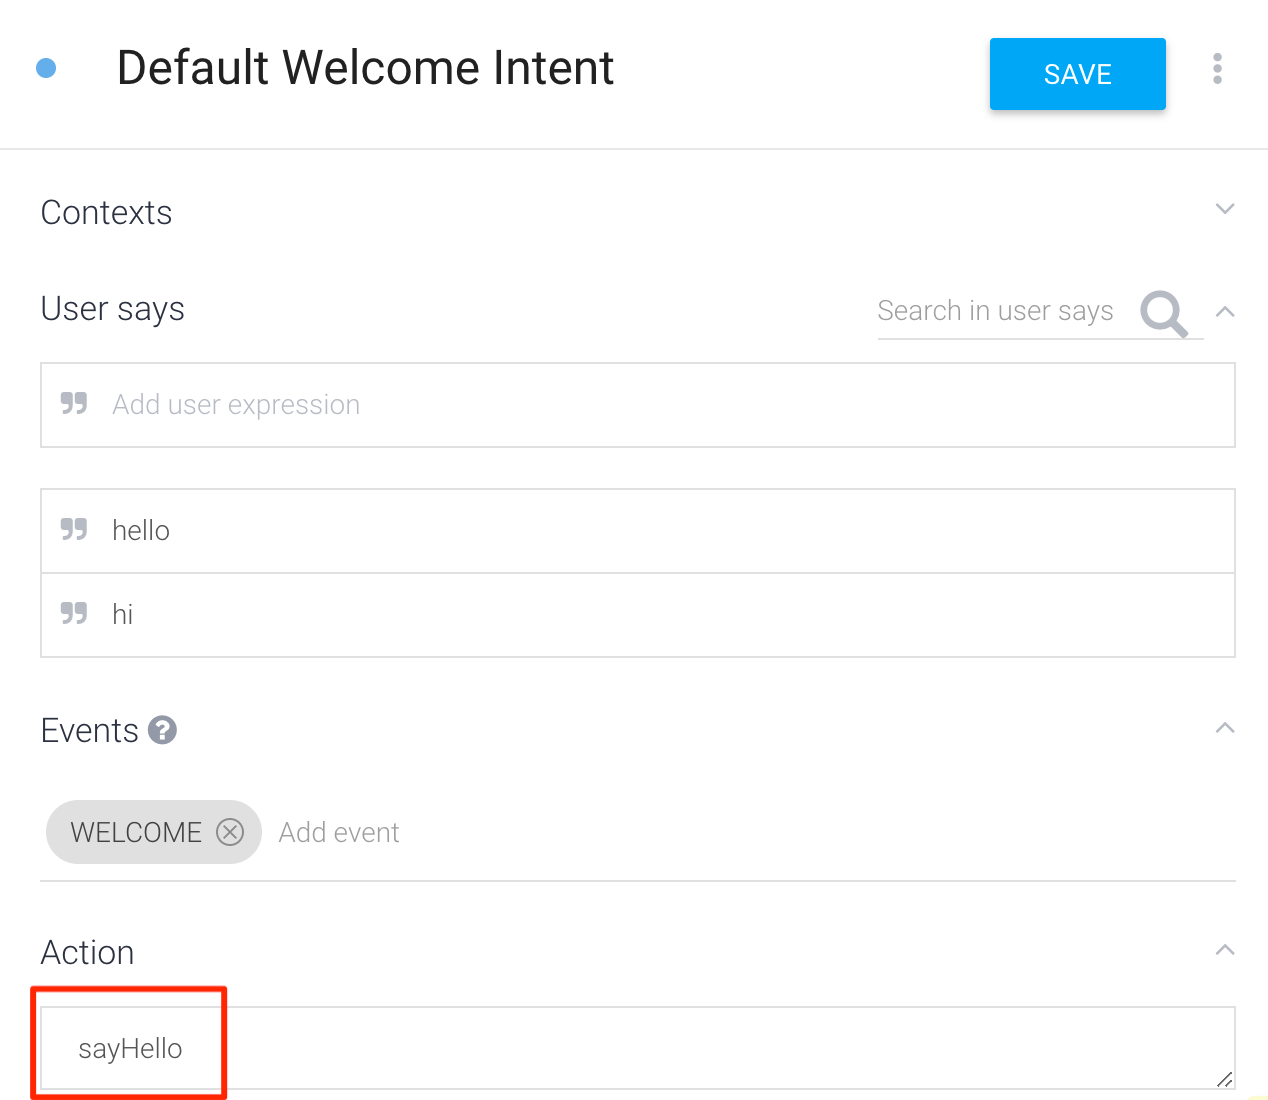
Add an action to your intent
Choose an intent that you wish to trigger (let us use the Default Welcome for now). Under the action, you should add the following: sayHello. It should match whatever you are handling in the PHP code.
Trigger the intent
In the API.AI console, type “Hi”. It should trigger the Default Welcome Intent and you should see “Hello from webhook” appearing on your console.
Webhook call failed. ErrorId: 8187508c-808d-4859-a301-fb1525c0d9c9
what is this error , sir?
Use ngrok and debug the webhook.
Hello, do you have any example of how to build a webhook in wordpress using the rest api for dialogflow?
regards,
Damian
I don’t. What specifically are you trying to accomplish?
Webhook call failed. Error: Failed to parse webhook JSON response: java.lang.IllegalStateException: Expected BEGIN_OBJECT but was STRING at line 1 column 1 path $.
What is this error,sir??
Learn how to use ngrok and step through the code. https://botflo.com/the-most-important-tip-for-building-dialogflow-webhooks/
is it possible to get parameter values only
I don’t have a code sample handy, but you should be able to do this by using $update[“result”][“parameters”] object. This is based on the JSON format sent to the webhook. Also remember that this sample is for v1 API. I plan to update it for v2 API when I get some time.
Hello,
I followed your excellent tutorial
es it is code example test.php still working at the current time?
it does not work for me
console = Not available
Diagnostic info-> FULFILLMENT STATUS=
Webhook call failed. Error: Failed to parse webhook JSON response: Expect message object but got: null.
(sorry for the translate online )
Please ?
This particular sample is for Dialogflow API v1. I will update it for API v2 over the next week or so – but it is a fairly simple change and you should be able to do it yourself once you look into the JSON formats for v1 and v2 and understand the difference between them.
https://github.com/DavidEbuka23/phpwebhook
Thanks for the link!
Hello,
Could you also create a tutorial in which you create a php webhook but also connect to a database to query the response which the user sends from the chatbot on api.ai?
But, I must say all your tutorials are really good.
Thank you for that.
Thanks. I am definitely considering it.