In this tutorial, I explain how to add a chatbot to your website using the Dialogflow Messenger integration.
Create the Dialogflow intents
First, create a new Dialogflow agent and add all your intents.
Embed the chat widget into your website
Once you have created all your intents, you can add it into your website.
Embedding the chat widget into your website is straight-forward.
Add the script to your web page
Once you create your Dialogflow ES agent, go to the Integrations pane, and select the Dialogflow Messenger integration.
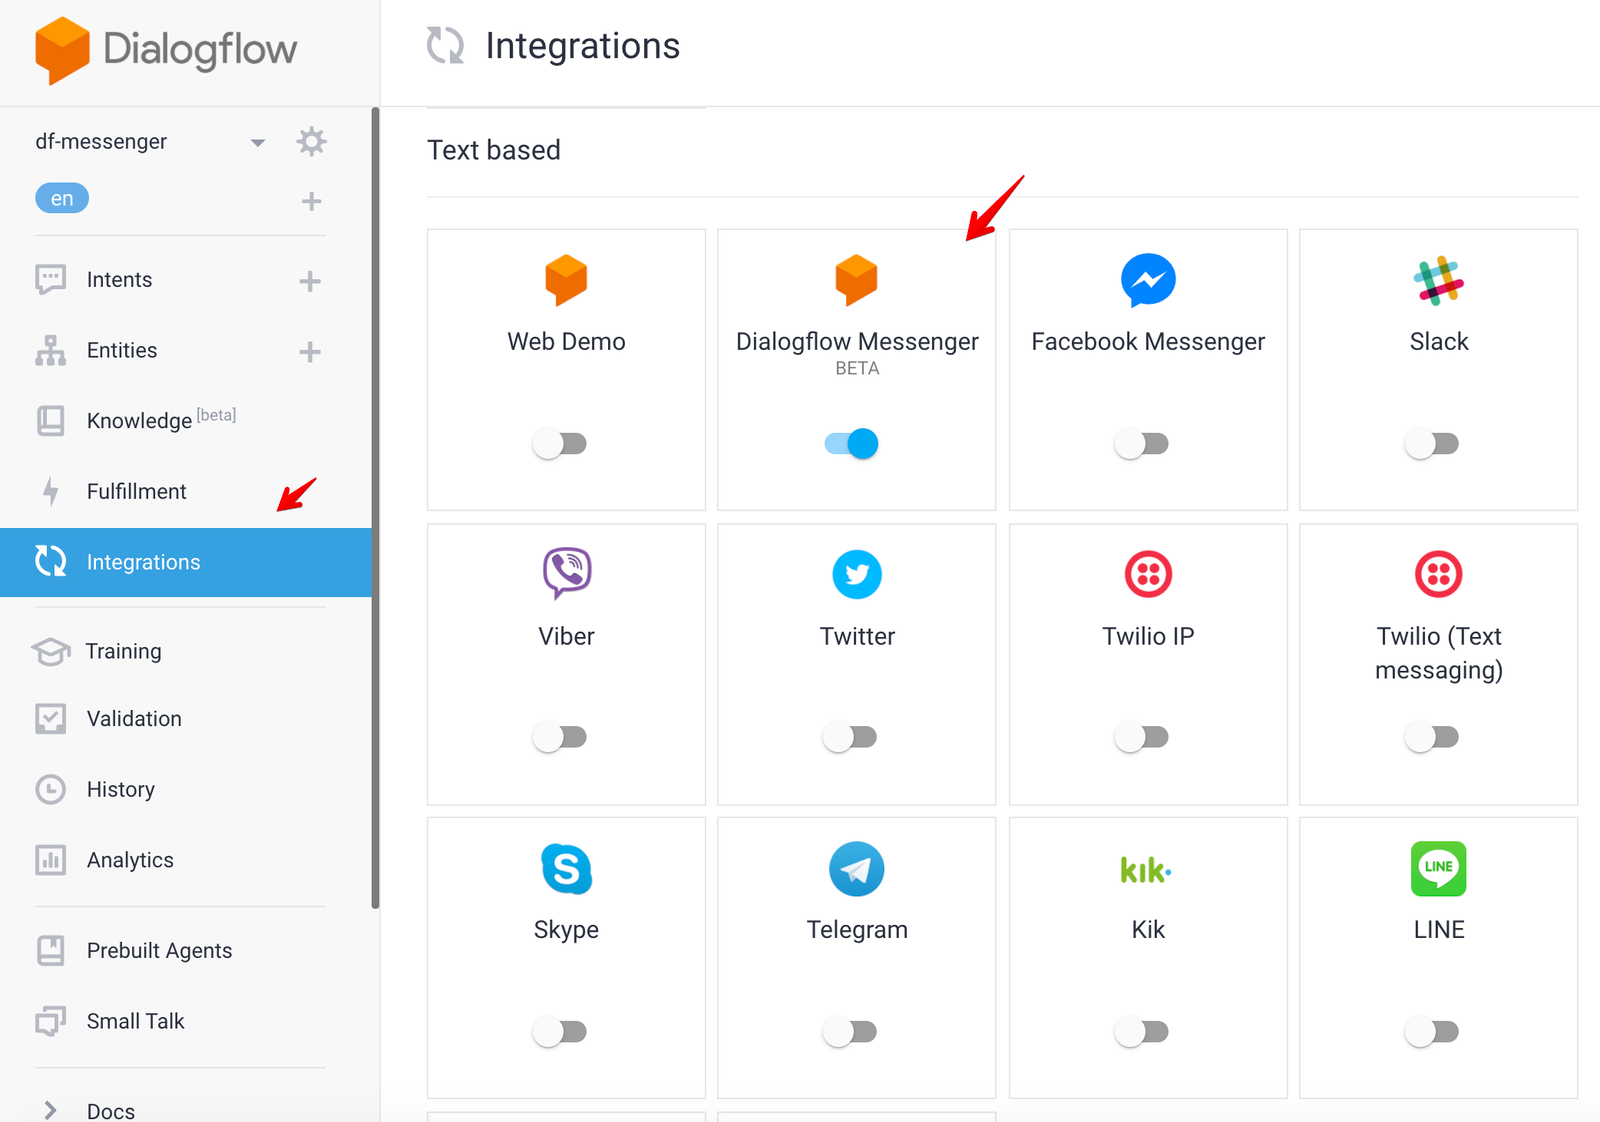
Select the Dialogflow Messenger integration

Now copy the script into your clipboard.
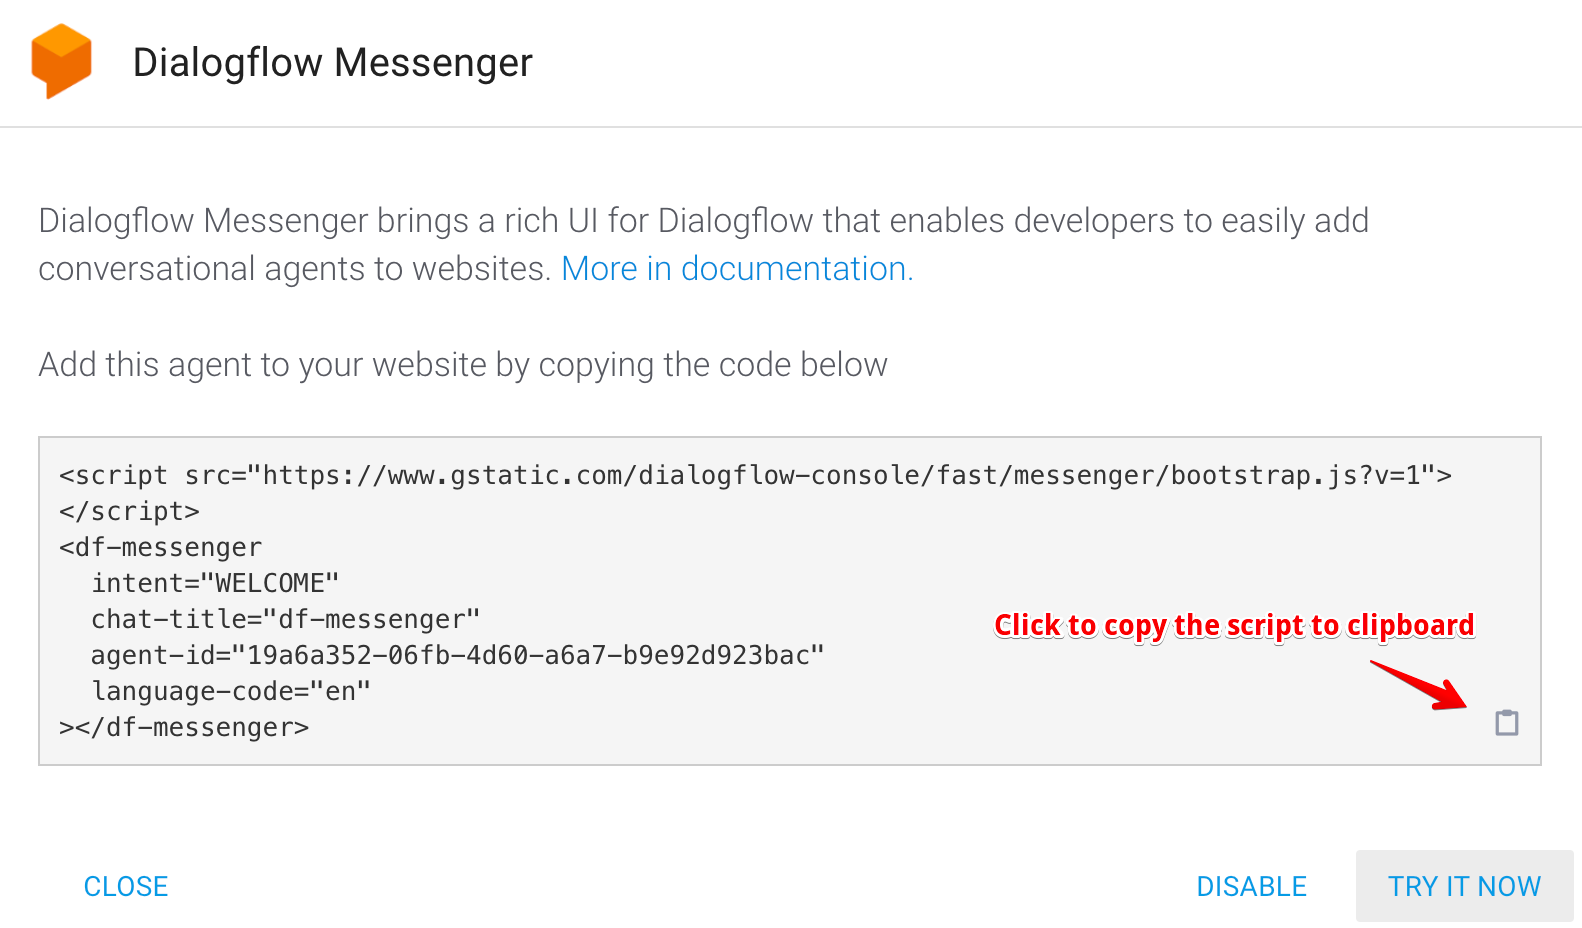
Copy the script to the clipboard

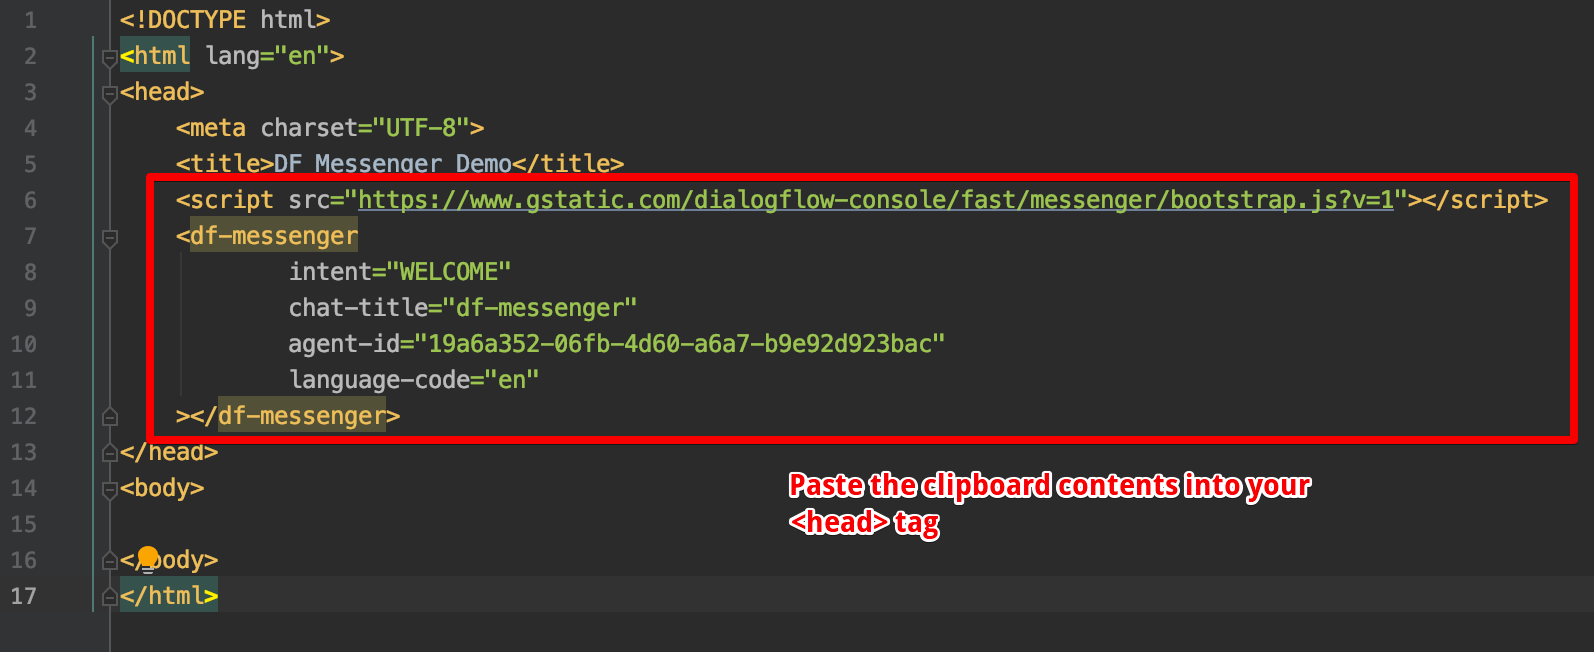
Paste the script you copied into the <head> tag of your HTML page.
Paste the script into your <head> tag

If you have a WordPress website, you cannot add JavaScript like this directly into your webpage.
In that case, use a plugin like
Insert Headers and Footers
and add the script into the “Scripts in Header” section.

Using the Insert Headers and Footers plugin to add the script

WordPress Gutenberg Update
With the release of Gutenberg, you can now simply add HTML code blocks directly into a page. So add a HTML block in Gutenberg and paste the script you copied from the Dialogflow console directly into the editor.
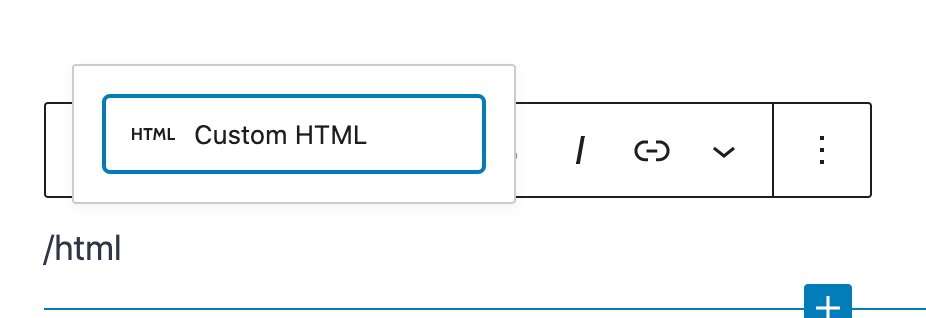
You can use the custom HTML block in WordPress Gutenberg and paste your script directly into the page

Test the integration
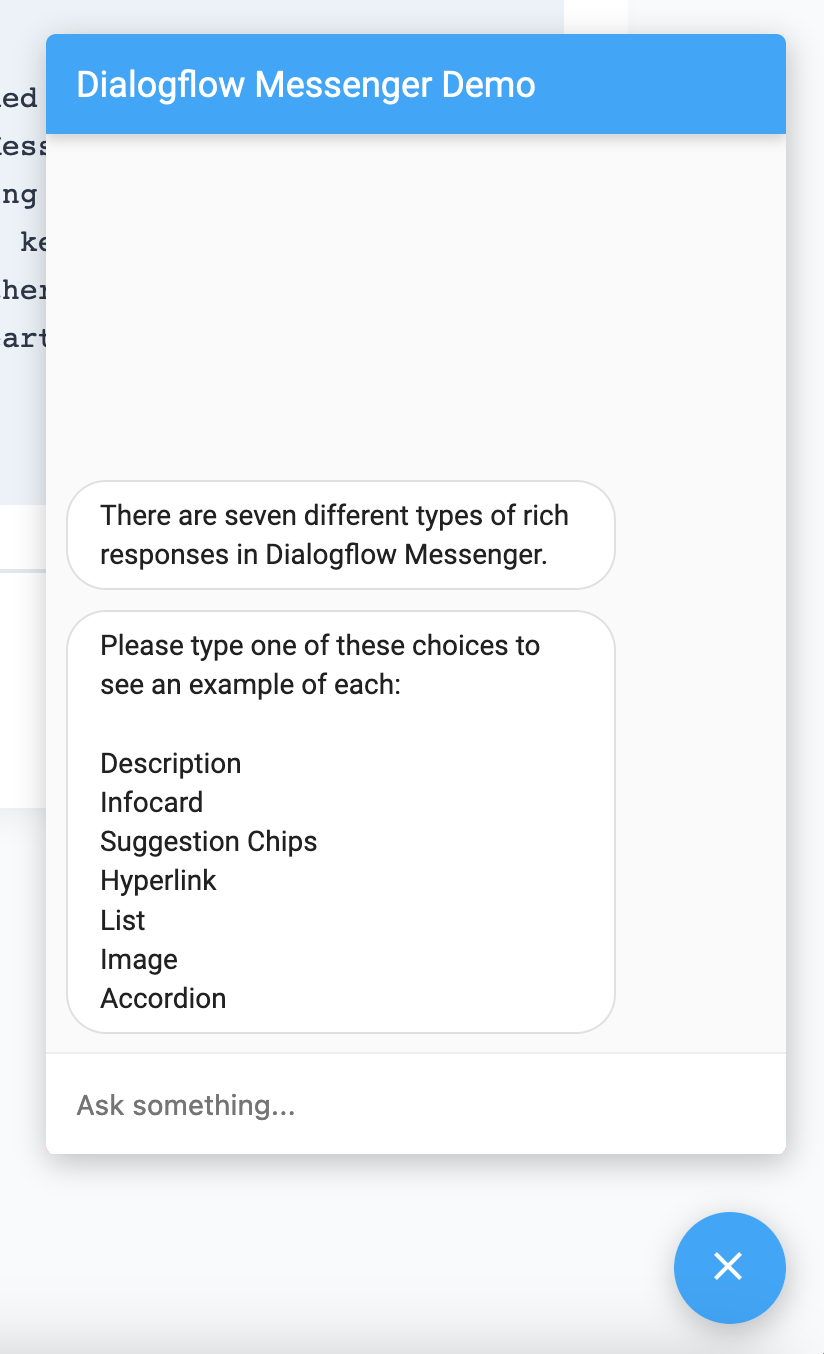
When you open the page in your browser, you will now see the chat prompt at the bottom right of your web page.

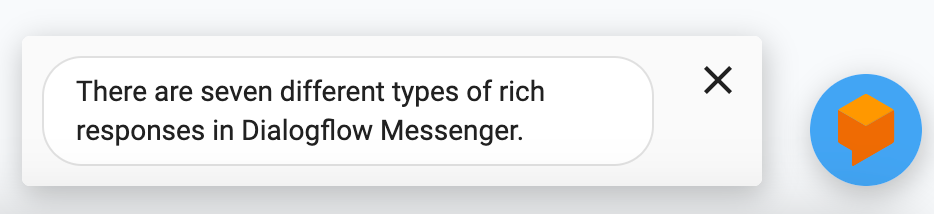
Now click on the chat prompt message, and you should see something like this.